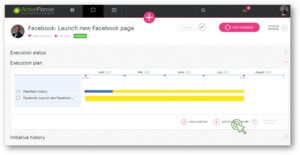
You can create an action in ActionPlanner by:
- Using the + button in your header
- Using the options button on your initiative or milestone
1. Create actions using the + button in your header
Create your action by locating and clicking the pink + button in the center of your personal header (see below)

2. Create action using the options button

Creating your action
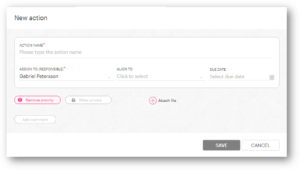
Once you have clicked “Create action”, you are asked to fill in all relevant information about the action in question (info marked * is mandatory):

| Item | Explanation | |
| ACTION NAME* | Specify what activity is to be accomplished. | |
| ASSIGN TO (RESPONSIBLE)* | The person who is responsible for executing the action.
To assign the action, chose a responsible person in the dropdown (yourself or someone else). |
|
| ALIGN TO* | Align your action to an activity in the existing roadmap by unfolding this dropdown OR leave this empty to create an unaligned action. Search for a specific activity using the search functionality. | |
| DUE DATE | Add a due date for the day the action is expected to be completed by. | |
| GIVE PRIORITY | Turn on the “Give priority” button, to prioritize and highlight the action on the responsible’s priority list. | |
| MARK PRIVATE | If the “Mark private” button is turned on, the action is only visible for you and the person you assign it to. | |
| ATTACH FILE | The ability to attach one or more files to an action by clicking the “Attach file” + button to the right of the “Make private” button. |
You also have the option to create an action while:
- creating a Milestone
- editing a Milestone
- giving feedback to a milestone
- giving feedback to an initiative
- adding a comment
TIP: Always describe the action names in a way that any person will be able to understand the steps to take to execute the action. This way colleagues can take charge on your behalf if you e.g. are on holidays etc.

2 Comments. Leave new