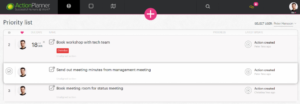
Priority list is the first page you see when you log into your account. It shows your prioritised items (actions, milestones and actions) across the roadmap. This table gives you a clean overview of how you have prioritized your immediate workload.
It does so by utilising the information and work you have already placed into ActionPlanner. From the information you have provided, the “Priority list” generates an interactive overview, with no additional effort required from you. Reading through this quick guide provides insight and understanding of these items, and how they can add value to your work.

Once you have more than one action prioritized, you will be able to drag and drop them within the table. By doing so you can place them in the order you wish to tackle them, starting with the top of the list and working your way down.
Best practice is to have the first action on your “Priority list” list being what you are working on right now and have the list only include the actions you expect to execute the present week. This will also indicate your expected workload, and will sanity check the planned workload versus time left in the week.
An example of how you can utilise the “Priority list”, is that you can sit down with your manager/employee once a week and use the list to prioritize what will be worked on in the coming week, using the drag-and-drop functionality. If changes occur either you or your manager can input/delete or reorganize the list to indicate the new prioritization. This “Visual Agenda” in real-time enables the right dialogue at the right time.
Prioritise items throughout the roadmap by hovering the item, unfolding the “options” on the right side and choose the option “Give priority”;


14 Comments. Leave new
… [Trackback]
[…] Info on that Topic: actionplanner.com/2022/09/21/priority-list/ […]
… [Trackback]
[…] Find More here to that Topic: actionplanner.com/2022/09/21/priority-list/ […]
… [Trackback]
[…] Find More on that Topic: actionplanner.com/2022/09/21/priority-list/ […]
… [Trackback]
[…] Info on that Topic: actionplanner.com/2022/09/21/priority-list/ […]
… [Trackback]
[…] Read More Information here to that Topic: actionplanner.com/2022/09/21/priority-list/ […]
… [Trackback]
[…] Read More Info here on that Topic: actionplanner.com/2022/09/21/priority-list/ […]
… [Trackback]
[…] Here you can find 46299 more Info on that Topic: actionplanner.com/2022/09/21/priority-list/ […]
… [Trackback]
[…] Read More on on that Topic: actionplanner.com/2022/09/21/priority-list/ […]
… [Trackback]
[…] Read More to that Topic: actionplanner.com/2022/09/21/priority-list/ […]
… [Trackback]
[…] Find More here to that Topic: actionplanner.com/2022/09/21/priority-list/ […]
… [Trackback]
[…] Find More Info here to that Topic: actionplanner.com/2022/09/21/priority-list/ […]
… [Trackback]
[…] Read More here to that Topic: actionplanner.com/2022/09/21/priority-list/ […]
… [Trackback]
[…] Information on that Topic: actionplanner.com/2022/09/21/priority-list/ […]
… [Trackback]
[…] Read More to that Topic: actionplanner.com/2022/09/21/priority-list/ […]