You can create a milestone in ActionPlanner by:
- Using the + button in your header
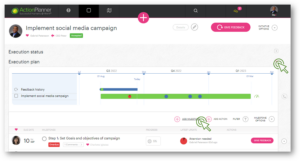
- Using the “Options” button on the execution plan
1. Create milestone using the + button in your header
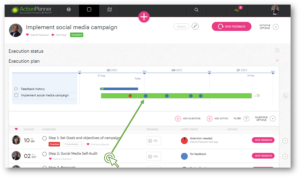
Create your milestone by locating and clicking the pink + button in the center of your personal header:

2. Create milestone from the “Execution plan”
Creating your milestone
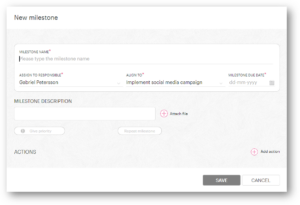
Once you click either of the options above, the system will open up a “Create milestone” box.

To create your milestone, you must fill in the mandatory fields: name and due date. This is the basic information. However, a description of the milestone would add more value to future revisions and to facilitate teamwork and knowledge sharing.
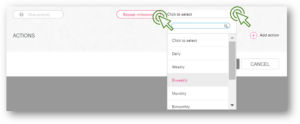
If relevant, you can repeat the milestone.

Actions for milestones
In ActionPlanner you can add actions to your milestones. They serve the purpose of allowing you to clearly define all the operational steps necessary to attaining the milestone. To create an action while you are creating your milestone, click the pink + button located in the lower right hand corner, above the SAVE and CANCEL button.

You can also create them later, if you are not ready to add them at this stage. Do this by hovering the milestone and click on the “options”-icon located to the right the milestone.
Once you click; a new window will open requesting the necessary data for the action and the person responsible for the action.
When you have created your milestones and actions, you need to save the initiative and you are ready to commence execution.
This is how it should look after you save the initiative. Notice that the circles in your timeline are the visual representation of your milestones.


16 Comments. Leave new
… [Trackback]
[…] Read More Information here on that Topic: actionplanner.com/2022/09/21/create-a-milestone/ […]
… [Trackback]
[…] Find More here on that Topic: actionplanner.com/2022/09/21/create-a-milestone/ […]
… [Trackback]
[…] Info to that Topic: actionplanner.com/2022/09/21/create-a-milestone/ […]
… [Trackback]
[…] There you can find 53294 additional Info on that Topic: actionplanner.com/2022/09/21/create-a-milestone/ […]
… [Trackback]
[…] Information on that Topic: actionplanner.com/2022/09/21/create-a-milestone/ […]
… [Trackback]
[…] Find More on on that Topic: actionplanner.com/2022/09/21/create-a-milestone/ […]
… [Trackback]
[…] Read More on to that Topic: actionplanner.com/2022/09/21/create-a-milestone/ […]
… [Trackback]
[…] Here you can find 82116 additional Information to that Topic: actionplanner.com/2022/09/21/create-a-milestone/ […]
… [Trackback]
[…] Read More Info here on that Topic: actionplanner.com/2022/09/21/create-a-milestone/ […]
… [Trackback]
[…] Here you will find 78401 additional Info to that Topic: actionplanner.com/2022/09/21/create-a-milestone/ […]
… [Trackback]
[…] Here you will find 12553 more Information to that Topic: actionplanner.com/2022/09/21/create-a-milestone/ […]
… [Trackback]
[…] Find More on to that Topic: actionplanner.com/2022/09/21/create-a-milestone/ […]
… [Trackback]
[…] There you can find 17236 more Info to that Topic: actionplanner.com/2022/09/21/create-a-milestone/ […]
… [Trackback]
[…] Info to that Topic: actionplanner.com/2022/09/21/create-a-milestone/ […]
… [Trackback]
[…] Find More Information here to that Topic: actionplanner.com/2022/09/21/create-a-milestone/ […]
… [Trackback]
[…] Find More Info here to that Topic: actionplanner.com/2022/09/21/create-a-milestone/ […]